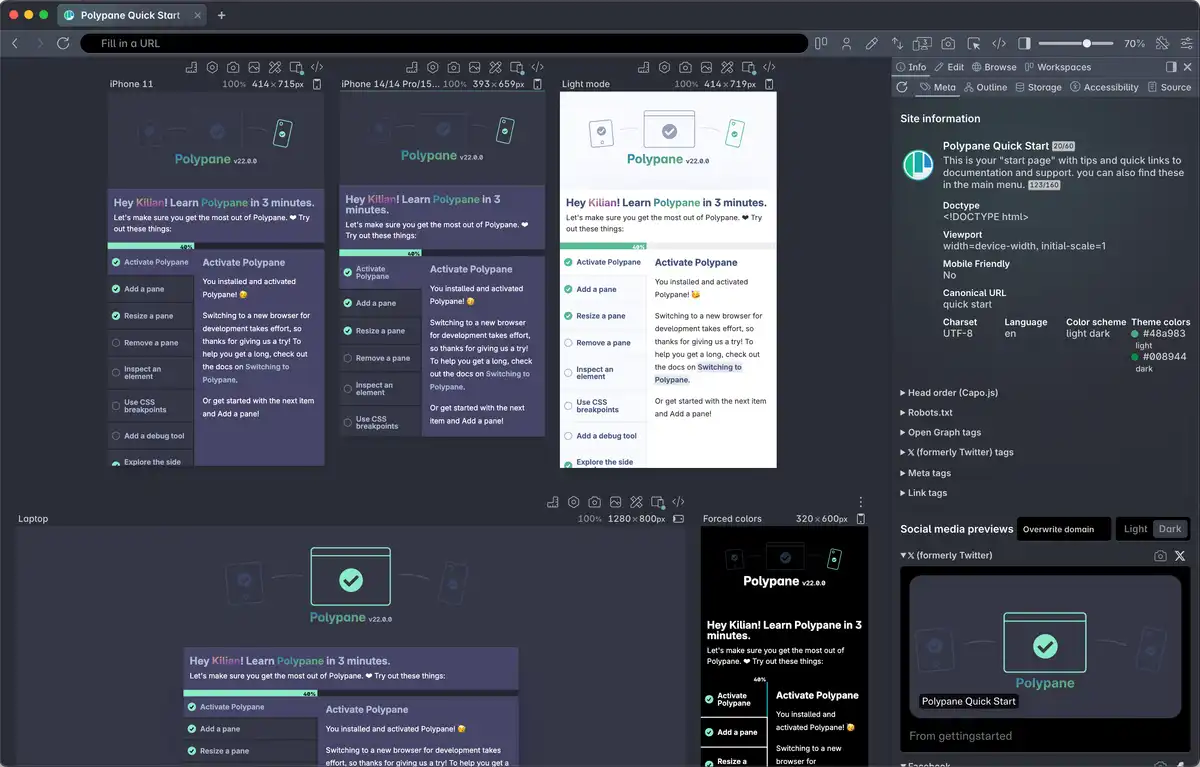
Documentation
Learn how Polypane improves your workflow
Making screenshots
Polypane lets you make screenshots of all your panes together, the visible viewport of a single pane, the full height of a single pane or of a single element. Screenshots include any active debug tool overlays.
For a tutorial on all the different ways to make screenshots, check out the article Capturing screenshots in Polypane.
Polypane also supports recording a pane with the "Start recording" option. This will create a video of the pane, including all interactions and debug tools. Learn more about recording in Polypane.
Overview screenshot of all panes
Click the camera icon ( ) in the address bar or press cmd/ctrl p to create a screenshot of all your panes in your current layout.

The overviews will show both the pane name and the dimensions.
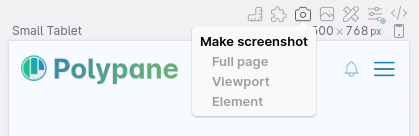
Screenshot all panes at once
Right-click the camera icon in the address bar to choose to create viewport of full page screenshots of all panes on screen. Polypane will store the screenshots in a folder of your choice.
Single page screenshots
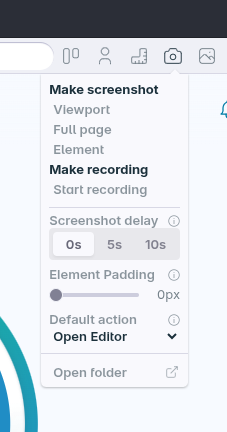
In each pane header you will also find a camera icon ( ) to create screenshots of that pane. If you click it three options will appear: Full page, Viewport and Element.
Screenshots include the debug tools applied to them, as well as any changes made to the page with snippets or the Elements Panel.
Viewport screenshots
Viewport will create a screenshot for what you see in the current pane.
Full page screenshots
Full page will create a screenshot of the entire height of the page. Creating a full page screenshot takes a while, during which we blur the pane and prevent any interactions.
We do a lot to make sure that full page screenshots look like you expect them to and as a result, full page screenshot are generally much better than other browsers.
Element screenshots
With the Element option, you can highlight any element on the page and click it to create a screenshot of only that element.
If you are having trouble clicking the right element, you can also use the Elements Panel to select an element to screenshot.
Element padding
You can configure the padding around an element screenshot in the settings. This padding is added to the element screenshot to give it some breathing room. The default is 0 pixels, but you can set it to any value you want with the slider or by typing in a value manually.

Measured area screenshots
IF you have a visible Area Measure overlay the "Measured area" button will be available and will take a screenshot of the area you have selected. This is useful when you need to screenshot a portion of the page that can't neatly be captured by the element screenshot functionality.
Screenshot delay
You can delay screenshots by 5 or 10 seconds to get your page in order before a screenshot it taken to include parts of the page that require hovers or are time sensitive.
To set whether you want no delay, 5 seconds delay or 10 seconds delay, right click the camera icon in the address bar to open up the delay options (They are visible in the pane header as well). A countdown will show to let you know how much time you have left, and on hover the delay will be shown in the camera icon.
Default action for screenshots
You can decide what to do after creating a new screenshot by setting the Default action in any of the screenshot menus. The options are:
- Open editor (This is the default)
- Save to disk (using the last used folder. Click the notification to open the folder)
- Copy to clipboard
Open screenshot folder
Polypane remembers the last used folder for saving screenshots. You can open that folder by clicking the notification that appears after saving a screenshot, or by right-clicking the camera icon in the address bar or above a pane and selecting "Open folder".
Screenshot editing
After a screenshot is made, the editing interface appear. It lets you annotate, redact and crop the image before saving it, powered by Pintura.
Saving and copying
There's three ways to save or copy your screenshot:
- Save directly to disk ⌘ S
- Save as… to disk ⇧ ⌘ S
- Copy to clipboard ⌘ C
Save directly to disk is the fastest, and will store your screenshot with a predetermined name in the last used folder (By default, your home directory). You can click on the notification to open that folder.
We support saving the image as a PNG (default), JPEG or PDF file. Images copied to the clipboard can be pasted into Slack, documents etc.
Screenshot editing tools
Annotate
The annotate tab will let you annotate the image with lines, arrows, paths, boxes, circles, markers, freeform drawing and text, letting you highlight certain areas of the image before sharing it.
Each annotation tool can be switched to with a single character. Hover over the tool to see the shortcut, or go to Screenshot editing shortcuts for the entire overview.
When selecting a new color, the colors you picked with the color picker are available for quick selection.
Stickers (shortcut S)
Stickers will let you add Emoji and images from your device, as well as some custom tools. The last seven selected Emoji are visible for you to quick select.
- Select image
Pick an image from disk to add to your screenshot - #️⃣ Number
Add a new number to the image with every click, so you can quickly explain ordering issues, or refer to the numbers in a ticket or email. - 📏 Measure
Draws a "redline" on the screenshot that shows its length. Use this to communicate size information. Hold shift while dragging to align the line vertically, horizontally or diagonally. - 😀 Emoji
A full emoji picker, divided into categories and with search. Any picked emoji will be added to the quick-select option.
Redact (shortcut B)
Quickly redacts parts of the image. Pixels are scrambled before blurring to prevent the retrieval of the original data.
Crop (shortcut Z)
Crop the image to different dimensions before saving.
You can also zoom out in Crop mode to add whitespace around your image for you to add annotations:
Resize (shortcut X)
Resize the image. Click the lock icon to maintain the aspect ratio.
Have a question about Polypane?
Reach out via (real human) chat, Slack or our contact form:
Contact SupportBuild your next project with Polypane
- Use all features on all plans
- On Mac, Windows and Linux
- 14-day free trial – no credit card needed