Documentation
Learn how Polypane improves your workflow
Projects
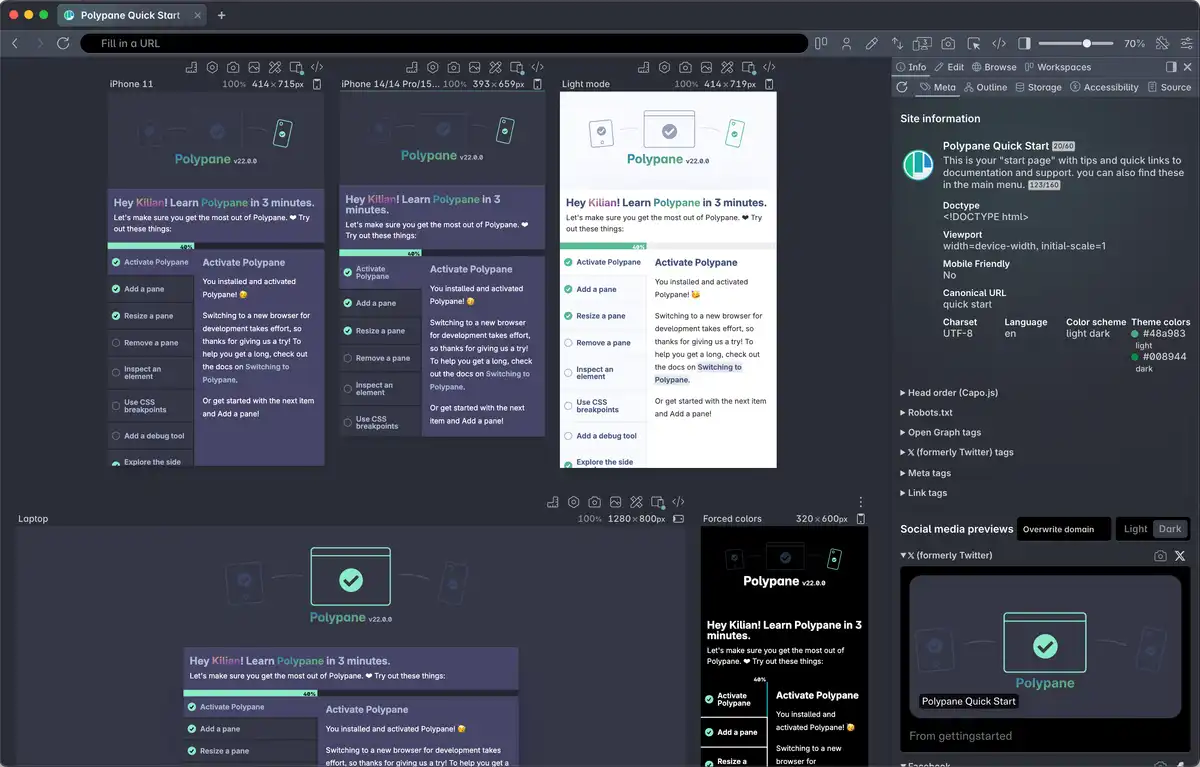
Polypane supports a project based workflow that lets you switch between different sets of tabs, settings and bookmarks quickly, making it easy to work on multiple projects.
Each project can have its own set of tabs, environments, bookmarks and session, as well as pinned tabs in the browse panel so you get the right setup for each project without having to reconfigure anything when switching projects.
Using Projects
The current project is always visible in the top left corner of Polypane. Clicking on the project name opens the projects overview where you can quickly switch to a different project, edit projects or create a new one.
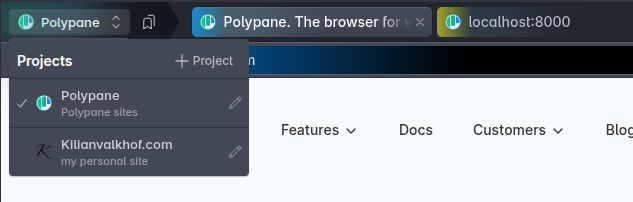
Projects can also be switched using the command bar by searching for the project name. The command bar can also be used to add new projects.
To re-order projects in the project selector, drag and drop them.
Bookmarks
Each project can have its own set of bookmarks. If a project has bookmarks, a new bookmark icon is shown next to the project name in the top left corner. Clicking this icon lists all the bookmarks for a project. Type in the filter to quickly find a bookmark, or use the up/down arrow keys to navigate the list.
Clicking a bookmark opens them as a new tab, and clicking the Globe icon opens them in the browse panel. When using the arrow keys to select a bookmark, you can press Enter or Space to open in a new tab, or press the Tab key to focus the Globe icon and press Enter or Space to open in the browse panel.
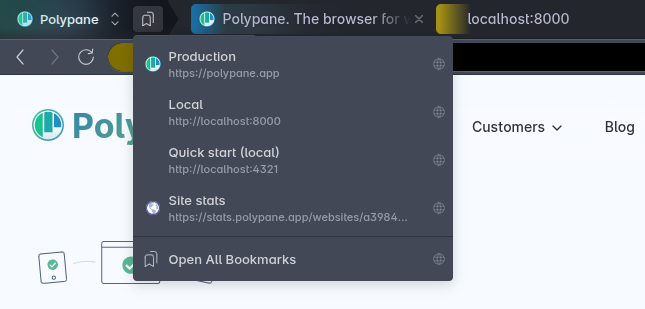
Click "Open All Bookmarks" to create tabs for all bookmarks in the project at once, or press the globe icon to open all bookmarks in the browse panel.
Environments
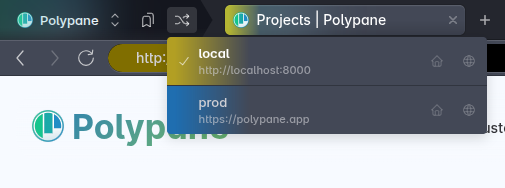
Each project can have multiple environments that map to your local, staging, production and other URLs. Each environment can have its own name and color, which is shown in the tab and address bar to help you quickly identify which environment you're working on.
Switching between environments will keep your current path, so if you're on /about in staging and switch to production, you'll be taken to the production /about page.
Click the environments button to show the environments, or middle-click the button to advance to the next environment.
In the list of environments, clicking one will switch the page to that environment while middle clicking will open that page in a new tab for that environment.
The home icon next to each environment opens that environment's root URL. Middle click it to open the root URL in a new tab. The globe icon opens the environment in the browse panel.
Project session
When setting a project session, all tabs in the project (including those in the browse panel) will use the project session unless overridden by a tab or pane specific session.
This makes it easy to keep your projects fully isolated from each other, for exmaple when they use the same sites or third parties but with different user accounts.
Browse panel
The browse panel has pinned tabs that are available throughout your project and will always use the project session. Regular browse panel tabs are specific to the currently shown tab in the main browser area and will use the same session as that tab.
Creating and editing projects
To create a new project, open the project manager by clicking on the project name in the top left corner and click the "+ Project" button. You can then give your project a name and icon, add an optional description and session, and add the bookmarks you want to have available in this project.
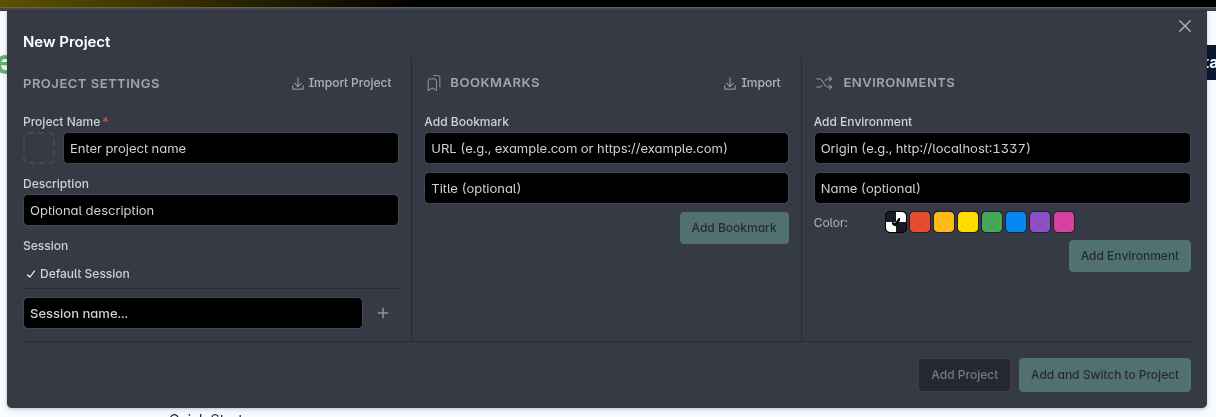
When adding a project you can opt to open all the bookmarks as new tabs for the project, and you can also choose to switch to the new project immediately.
Importing a project
To import a project, Add a new project and click the "Import project" button next to "Project Settings". This will let you select a project JSON file exported from another Polypane installation. The imported project will contain all its bookmarks, naming settings and session.
Exporting a project
To export a project, open the project manager for the project by clicking the pencil icon in the Project selector, then clicking "Export project" next to the "Project Settings" header. This will export the project as a JSON file that can be imported in other Polypane installations.
Project icon
You can choose an icon for your project from the built-in set of emojis or a custom favicon by clicking on the icon in the project creation or edit screen.
The icon selector automatically lists all the favicons for your bookmarks, or you can add your own URL and we'll resolve the favicon for you. The favicon field also accepts image links and data urls, so you have full control over the icon used for your project.
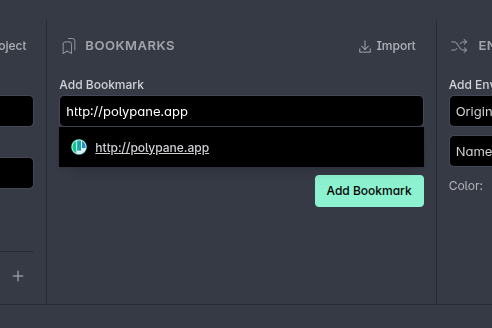
Adding bookmarks
Bookmarks can be added to a project when creating or editing it. The bookmarks field supports autocomplete from your full browser history, so adding pages you've visited before is quick and easy. You can also add bookmarks by pasting URLs directly into the field. Polypane will automatically resolve the favicon.
The page title is optional and can be renamed it when need for clarity. Both the name and the URL are shown in the bookmarks dropdown when added, otherwise just the URL is shown.
Importing bookmarks
When adding or editing a project, you can import bookmarks from a bookmarks.html file exported from any browser. We automatically remove any non-URLs (like bookmarklets, folders and internal pages) and add the other URLs as bookmarks to your project. You can also import bookmarks from a bookmarks.json file exported from Polypane.
Exporting bookmarks
When you edit an existing project you can export its bookmarks to a bookmarks JSON file that can be imported in other Polypane installations. This makes it easy to share project bookmarks between different devices or team members.
Reordering bookmarks
Drag and drop bookmarks in the project edit screen to reorder them. The order is reflected in the bookmarks dropdowns throughout Polypane.
Importing and exporting bookmarks into Be Inclusive
The accessibility auditing tool Be Inclusive has support for importing and exporting target samples as a Polypane bookmarks file, so you can easily import those into your project, or export bookmarks from Polypane to quickly set up a new project in Be Inclusive.
Check out their documentation for more information on how to do this: exporting target samples as bookmarks and importing bookmarks as target samples.
Adding Environments
Environments get added to a project much like bookmarks, but the autocomplete only suggests domains instead of full URLs. Each environment needs a URL, and can optionally have a name and color associated with it.

The color you pick is shown in the tab and address bar when that environment is active, making it easy to visually identify which environment you're working on.
Reordering environments
Drag and drop environments in the project edit screen to reorder them. The order is reflected in the environments dropdown.
Hiding the project selector
If you don't want to use projects, you can hide the project selector in the top left corner by going to the app settings in the top right and unchecking "Show project selector".
Have a question about Polypane?
Reach out via (real human) chat, Slack or our contact form:
Contact SupportBuild your next project with Polypane
- Use all features on all plans
- On Mac, Windows and Linux
- 14-day free trial – no credit card needed